https://www.atlasnova.com/product/one-gallon-colloidal-silver-generator/
I joined a forum called “Gold is Money2”. It is a forum for responsible individuals and serious investors. One sub-forums Is devoted to alternative health and colloidal silver. I started posting on this forum about what I have learned about making colloidal silver. I was greeted enthusiastically. With the help of their input, I decided to make a 1 gallon per day colloidal silver generator. As these people could afford to spend money for the best in life, I designed a no-compromise generator. It would produce 1 gallon per day of colloidal silver of strength over 20 PPM with small particle size and stability that would allow it to be stored in clear glass containers for an unlimited time. We are still selling this same unit some 20 years later. The cost for this unit is over $200 as it includes over 3 ounces of AtlasNova 9999 silver wire. Many of these make colloidal silver for large families, and many more are used commercially. The more enterprising customers of these units secure a supply of bottles and labels and develop a local business with one great advantage. A little-known fact is that colloidal silver does not travel well. Vibration causes the ions to collide and form larger particles until they drop out of the solution, becoming tiny black dots at the bottom of the bottle. I confirmed this with one of the 1st gallons I made with the 1 gallon per day generator. I shipped a friend in Florida 1 gallon that measured 22 ppm, asking him to send it back to me. UPS ground both ways. When I got it back, it measured only seven ppm. Even if the manufacturer used the proper method and took the required time to make it properly, it would still have to be shipped. So if people really can’t handle making it themselves, they should buy it from a local source.
The one gallon colloidal silver generator (CSG-1G) will enable you to make a gallon of high quality colloidal silver in 24 hours (more or less), depending on the quality of your distilled water. Powered by a universal power supply. Designed, manufactured, and assembled in the USA.SKU: CSG-1G
The 1 gallon per day colloidal silver
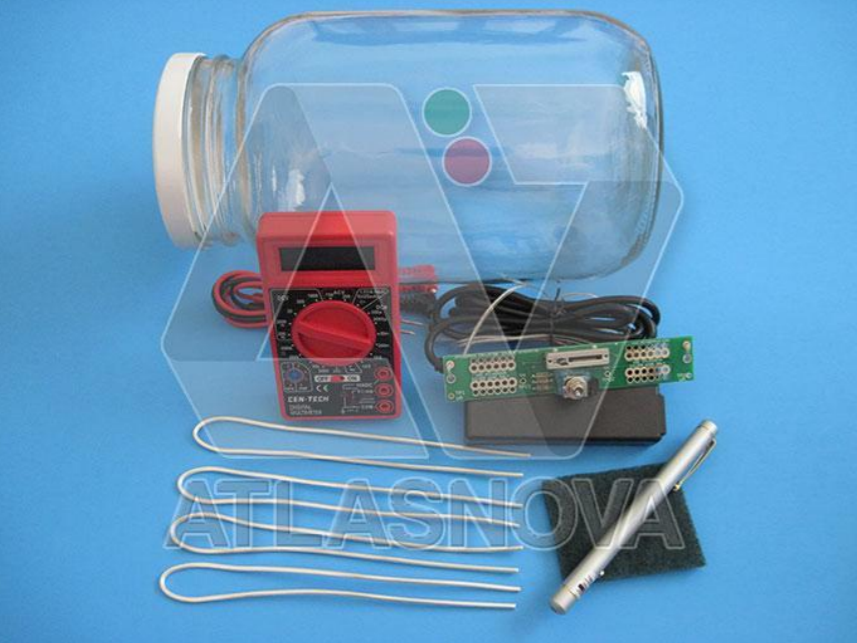
The One-Gallon Colloidal Silver Generator (CSG-1G) includes:
- 4 pieces of 15-inch 10 gauge pure 9999 silver wire
- 1 gallon mason jar
- 1 digital meter
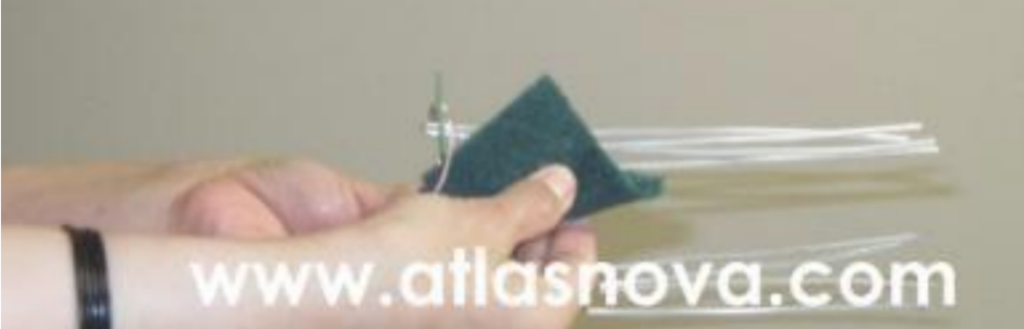
- 1 piece of scrubbing pad (to clean the silver wires)
- 1 piece of Atlasnova red laser pointer (no batteries)
- Instructions for making one gallon of colloidal silver using our CSG-1G
Please note that the color of the body of the red laser pointer will vary depending on what’s available in our stock.
To complete the parts and equipment in making a gallon of colloidal silver using our CSG-1G, you need to purchase the following:
- Distilled water
- 2 pieces of AAA batteries for the red laser pointer
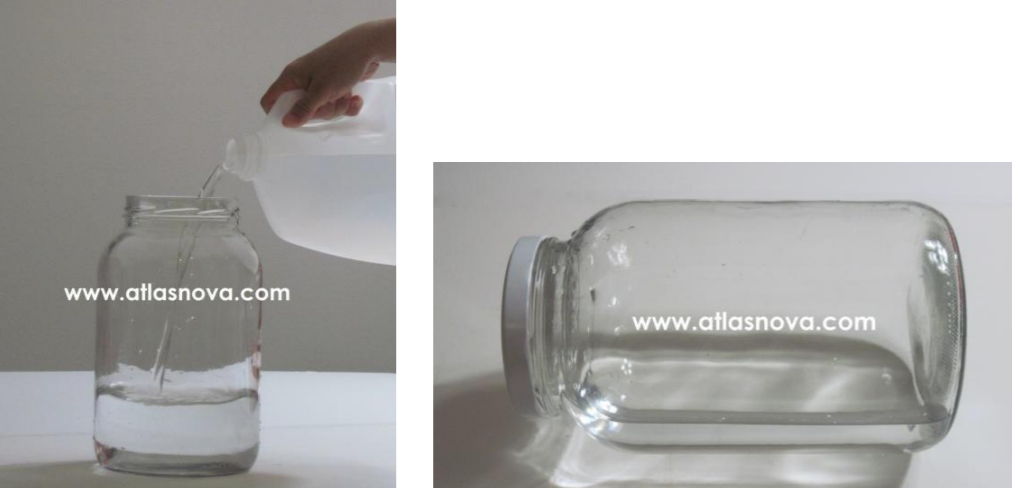
The one-gallon jar that is supplied will be clean when you receive it. However, a good idea would be to fill it half full of distilled water. Replace the cap tightly and give it a good deal of motion so that any dust particles that may have entered will now be in the water.

Then dispose off the water. Pour distilled water into the jar. Do not fill the jar beyond 1 inch below the top of the jar.
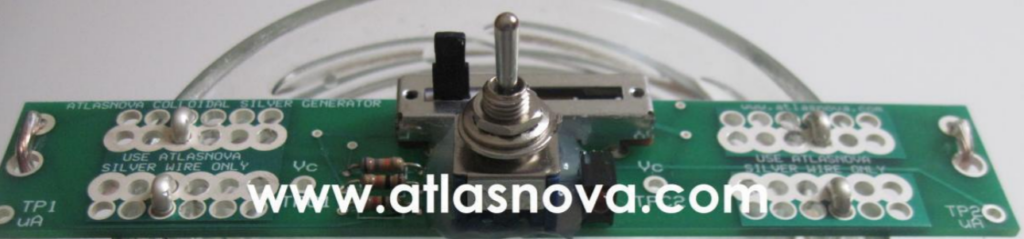
Make sure that the toggle switch on the printed circuit board (generator) is in the fully upright position. The sliding potentiometer should be positioned all the way to the left. Insert the silver wires into the holes as shown.
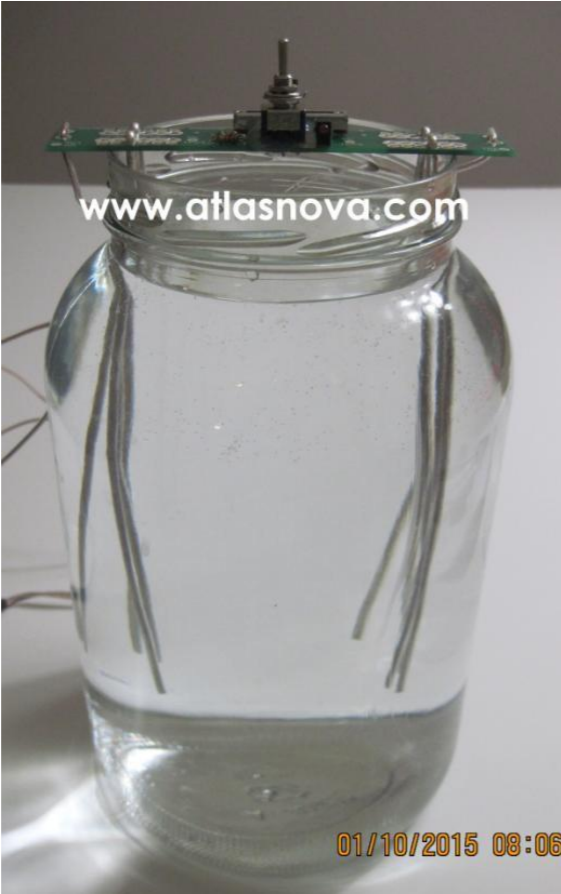
Place the printed circuit board (generator) with the silver wires on to the jar. Make sure that none of the silver wires are touching any part of the jar where the water is present. The silver wires should be as far apart as possible.
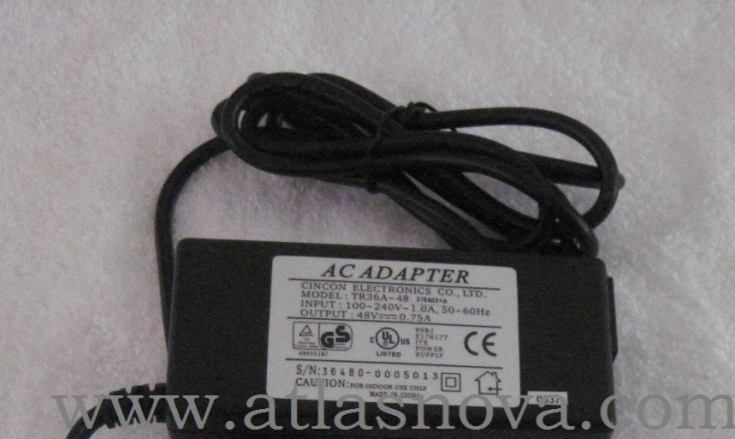
Plug the Universal Power Supply into a standard AC outlet.
Once the power supply is plugged in, you will see the red LED lit to confirm that your generator is ON.
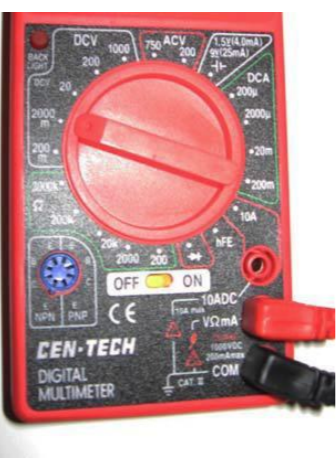
Plug the test leads into the Multimeter at the two lower sockets on the meter. The top socket is not used. It is only there for measuring very high amperage.
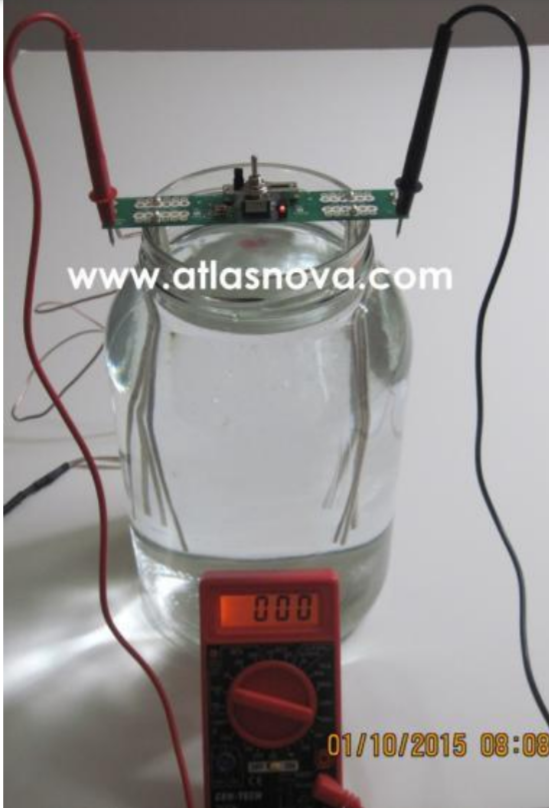
Put the two test leads into the two outer test points on the generator as shown. The meter should read zero volts.
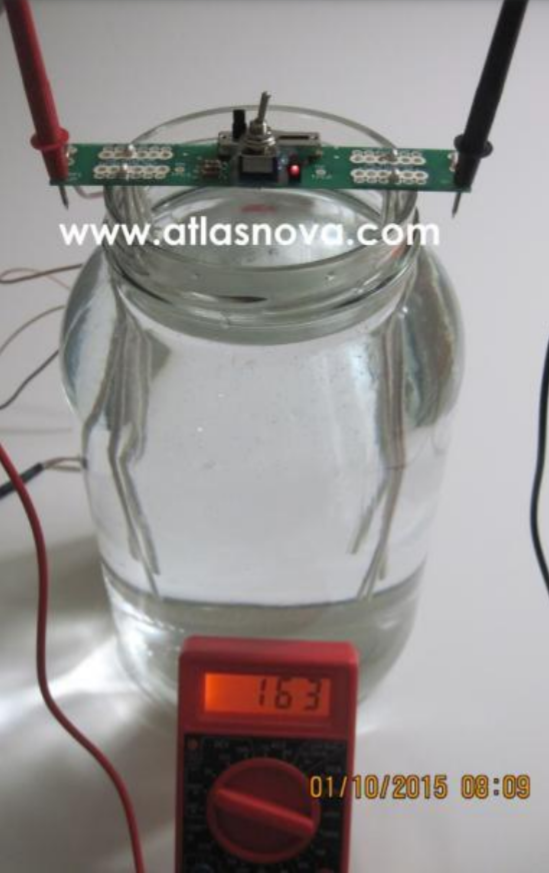
Position the sliding potentiometer all the way to the left. This will give you the lowest current. As shown in the picture, our digital meter reads 163 microamps. Please note that the reading will vary depending on the quality of your distilled water. Positioning the sliding potentiometer all the way to the left will take longer to make colloidal silver but will give a much better result. This reading will increase slightly as time goes by. It will
just take longer to get a good red laser beam but you will end up with a higher PPM and more stable colloidal silver.
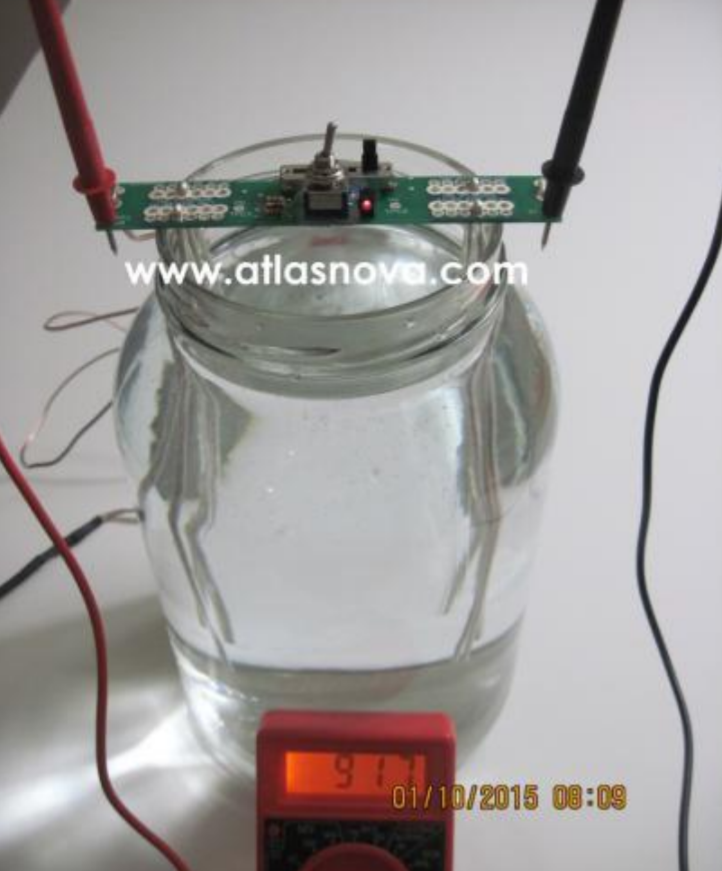
Positioning the sliding potentiometer all the way to the right will give you the highest current. As you can see in the picture, our digital meter reads 917 microamps. Please note that the reading will vary depending on the quality of your distilled water.
The position of the toggle switch points to the set of wires that will be the anode. By moving the toggle switch all the way to the left, the silver wires that were the anode will now serve as the cathode. You can set up your current the way you want. For these instructions, we will set our sliding potentiometer to the middle, keep the toggle switch all the way to the right, and set our current to 263 microamps. And we will continue the process.
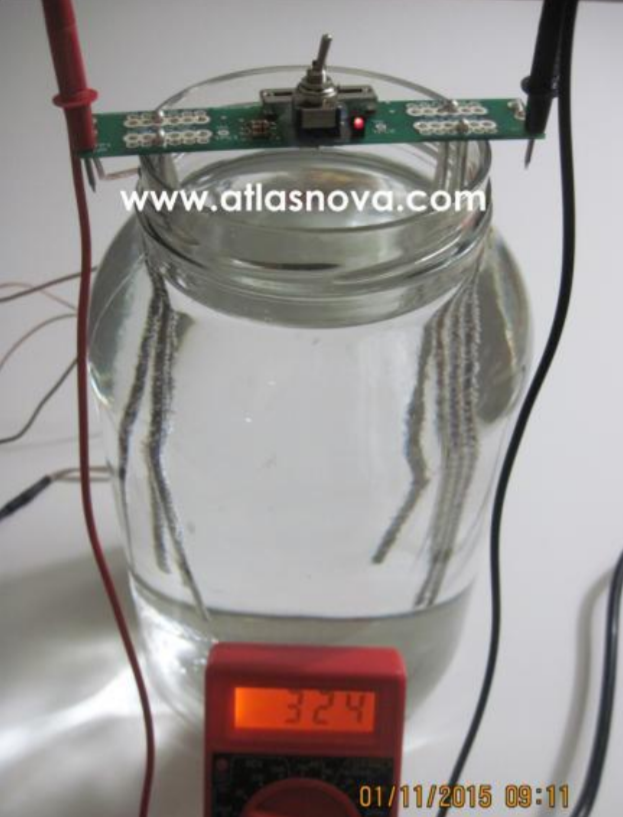
It is now the next morning and you can see that the current has increased overnight to where it now reads 324 microamps.
We now use our red laser pointer supplied with the kit and check to see that we have made a sufficient quantity of actual silver particles by seeing the red beam across the jar n dim room light. The first picture was taken in a bright room and the second picture was taken in a dark room.
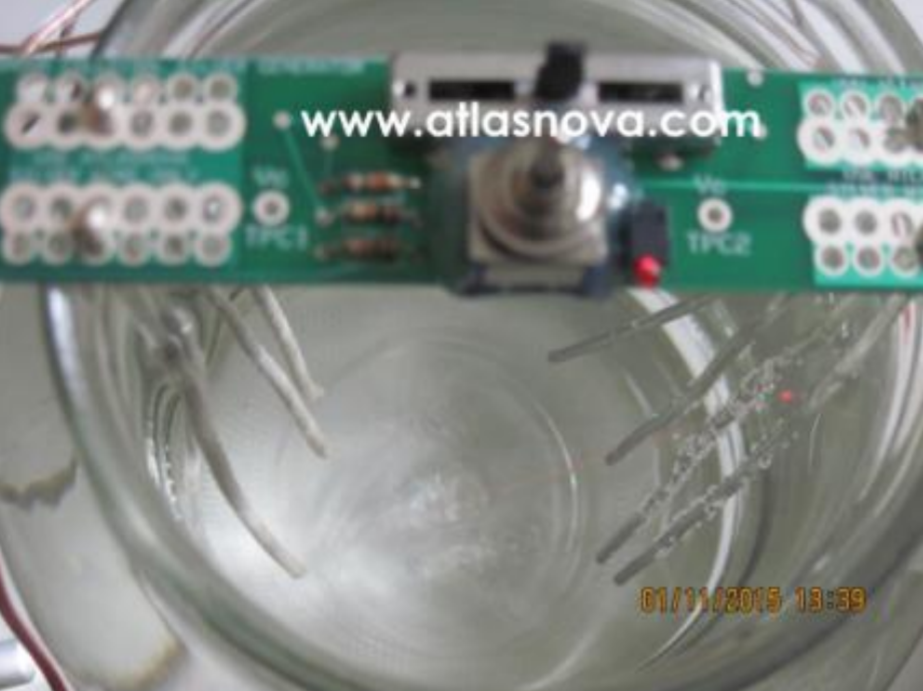
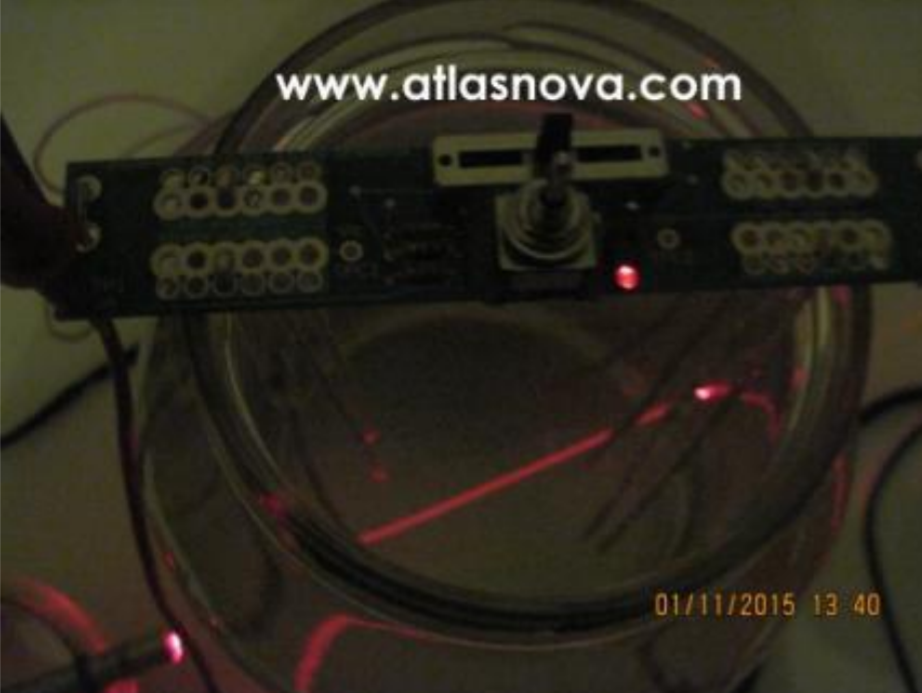
The red laser beam indicates that we have made particulate silver as well as ionic. As you can see by this picture, we have a nice strong red beam even in normal indoor room light. The water itself is still crystal clear. This means that we have avoided making overly large particles.
In the days before good laser pointers were available; the only way we had to ensure that we had made larger particles was for the water to turn yellow. You will find many people who, because of this, still believe that Colloidal Silver should be yellow in color. The fact is that a yellow color Colloidal Silver indicates particles in excess of 40 nanometers in size. Clear color means smaller particles. Small particles are better. Please note that if you have any kind of equipment to check your PPM, make sure that the toggle switch is in the fully UPRIGHT position before doing so.

In this picture we have submerged the probe of our Amber Electronic Conductivity Meter to measure the value of conductivity in Microsiemens. (Please note that our toggle switch is in UPRIGHT position). This is the same value for the PPM (parts per million) of the ionic part of our colloidal silver. As you can see in our picture, our PPM reads 16.2.
We are now finished with the process of making our one-gallon of colloidal silver. Unplug the universal power supply, remove the generator from the jar and clean the silver wires with the supplied scrubbing pad. Two or three swipes should suffice.
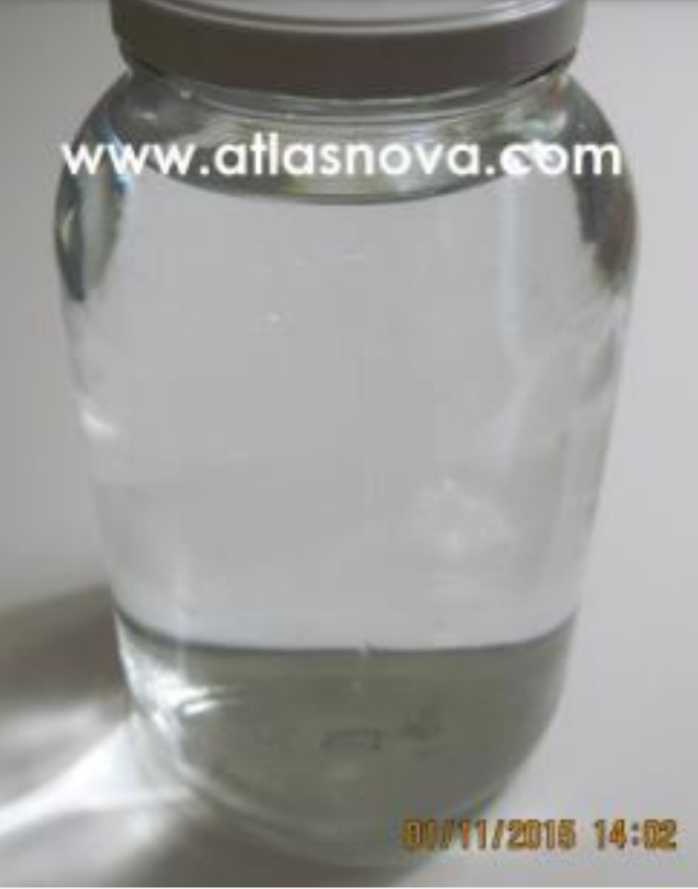
We now have a one-gallon of better colloidal silver than can be purchased at a store. We can do this hundreds of times before we have to buy more silver wire. You can just put the lid back on the jar to cover your One Gallon Colloidal Silver until you’re ready to use it.